After Dark: The Photographer's Guide to Luminous Bokeh in Low-Light Conditions
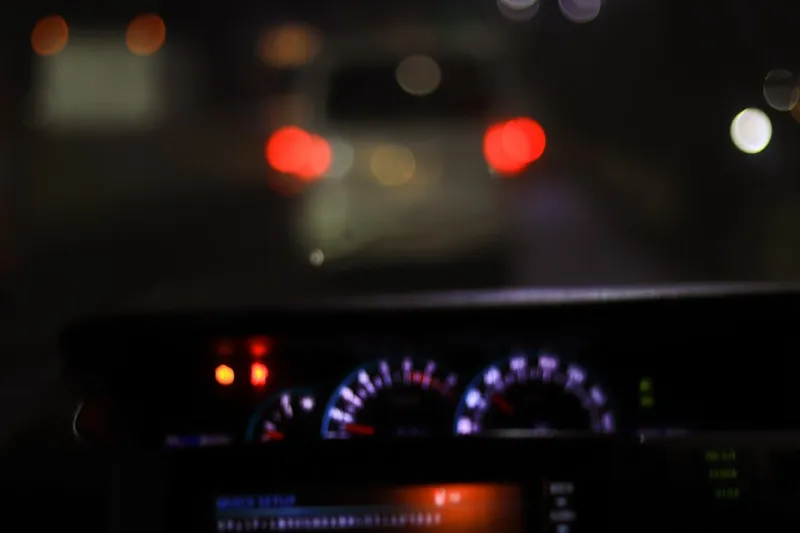
Photo: A S M Jobaer, CC BY-SA 4.0, via Wikimedia Commons
Most bokeh tutorials assume you're working in decent light. Golden hour. A bright window. A softbox-lit studio. The background is visible, the subject is cooperative, and your autofocus has something to lock onto.
But low light? Low light is where things get genuinely interesting — and genuinely complicated.
Shoot bokeh after dark and you're operating in a frontier that most photographers avoid because it demands more: more patience, more technical precision, more willingness to let things get a little weird and unpredictable. But the photographers who've cracked this space will tell you the same thing: the rewards are unlike anything you'll find in a well-lit studio.
Urban streetlights become floating orbs of amber. Neon signs dissolve into electric watercolor. A candle three feet behind your subject transforms into a warm, breathing glow that no post-processing filter can replicate. Low-light bokeh isn't just a technical challenge — it's a completely different visual language.
Why Low Light Changes the Bokeh Equation
Understanding why night photography requires a different approach starts with understanding what bokeh actually is: the optical rendering of out-of-focus light sources and surfaces by your lens. In daylight, those out-of-focus elements are lit evenly and predictably. At night, you're working with point light sources — small, intense, and wildly varied in color temperature — scattered across an otherwise dark field.
The result is that night bokeh tends to be more dramatic, more graphic, and more emotionally charged than its daytime counterpart. Those small light sources render as distinct, defined circles (or whatever shape your aperture blades produce — more on that in a moment). The contrast between the deep shadow and the bright bokeh balls creates a visual tension that's almost theatrical.
The challenge, of course, is that everything your camera relies on gets harder in the dark. Autofocus struggles. Noise creeps in at high ISOs. Your depth of field gets razor-thin at the apertures you need to gather enough light. One wrong move and your "luminous night bokeh" becomes a blurry, noisy mess.
Let's break down how to avoid that.
Lens Selection: Your Most Important Night Decision
In low-light bokeh work, your lens choice matters more than almost any other variable — more than your camera body, more than your tripod, more than your post-processing workflow.
You need maximum aperture. That means fast primes: f/1.4, f/1.2, or even f/0.95 if you're willing to spend serious money or go vintage. Zoom lenses, even excellent ones, almost always top out at f/2.8, which is workable but limiting when you're trying to gather light and create separation simultaneously.
For street and urban night work, a 35mm or 50mm prime at f/1.4 is the classic combination. It gives you a natural field of view, enough subject isolation to create compelling bokeh, and the light-gathering capability to keep your ISO at manageable levels. For more compressed, graphic compositions — shooting through a crowd, isolating a single light source against a distant cityscape — an 85mm or 135mm at f/1.8 or faster creates spectacular bokeh with that characteristic telephoto compression.
One underrated option for night bokeh: older manual focus lenses. Vintage glass from the 1970s and '80s — Helios 44s, Super Takumars, older Nikkor primes — often produces bokeh with a swirly, painterly quality that modern aspherical lenses are specifically engineered to eliminate. In low light, that character becomes even more pronounced. You can pick these up for $50–$200 on eBay, and adapted to a modern mirrorless body, they're remarkable creative tools.
ISO Strategy: Pushing Without Breaking
Here's where modern camera technology has genuinely transformed what's possible. Current full-frame mirrorless bodies from Sony, Nikon, and Canon can produce usable files at ISO 6400, 12800, and in some cases beyond. That's not a minor upgrade from the DSLRs of ten years ago — it's a fundamental expansion of what night photography can look like.
That said, there's still a right way and a wrong way to approach ISO in low-light bokeh work.
The priority chain goes like this: Nail your aperture first (wide open or one stop down from wide open for sharpest center performance). Set your shutter speed to the minimum you can get away with for your subject — 1/60 for relatively still subjects, 1/125 or faster if there's any movement. Then let ISO climb to wherever it needs to be to achieve proper exposure.
Noise in the in-focus subject area is a problem. Noise in the bokeh? Largely invisible. Out-of-focus areas smooth over grain in ways that can actually add texture and warmth to your background. This means you can often push your ISO harder in bokeh-heavy compositions than you could in a technically clean landscape shot.
For APS-C shooters, ISO 3200 is a reasonable ceiling before noise becomes distracting. Full-frame users can often push to 6400 or 8000 with modern noise reduction applied in Lightroom or Capture One.
The Shape of Your Bokeh Balls
This is a detail most photographers don't think about until they're reviewing images at 100% and wondering why their bokeh looks slightly hexagonal instead of circular.
Aperture blade count and shape directly affect the geometry of your bokeh highlights. Lenses with nine or more rounded aperture blades produce near-perfect circles at wide apertures — which is generally the most pleasing aesthetic for night work. Lenses with fewer, straighter blades produce polygonal bokeh (pentagons, hexagons, heptagons) that can look great in some contexts and clinical in others.
At maximum aperture, almost any lens produces circular bokeh regardless of blade count, because the full circular opening of the lens is what's shaping the light. Stop down even slightly, and the blade geometry starts to show. For night bokeh work, shooting wide open isn't just about light gathering — it's also about keeping those background light sources round and organic-looking.
Real-World Scenarios and What They Demand
Urban street scenes: The classic low-light bokeh environment. Streetlights, storefront windows, car headlights and taillights — all spectacular bokeh raw material. Work at f/1.4 to f/2, position your subject 10–15 feet in front of the light sources, and let the city do its thing behind them. The color temperature variation between different light sources (warm sodium vapor, cool LED, colored neon) creates a naturally rich, varied bokeh palette.
Concert and live music venues: Challenging because your subject is moving, lighting is constantly changing, and you're often shooting from a distance. A 70–200mm f/2.8 is the standard workhorse here, though an 85mm f/1.4 can produce extraordinary results from the photo pit. Continuous autofocus is essential — this is not the environment for manual focus heroics.
Dimly lit interiors — restaurants, bars, cafes: Candles and Edison bulbs are among the most beautiful bokeh-generating light sources in existence. They're warm, they're organic, and they render as soft, slightly irregular circles that feel genuinely cinematic. Shoot with a 35mm or 50mm at f/1.4–f/1.8 and let those background candles become part of your composition.
Night portraits outdoors: Position your subject near a single practical light source (a street lamp, a lit window, a neon sign) and put interesting city light in the background at distance. The balance between the near practical light and the far background bokeh is where the magic happens.
Post-Processing: Enhance, Don't Manufacture
The best low-light bokeh images are made in camera. Post-processing can refine them — but it can't save a fundamentally flawed capture.
In Lightroom, the Dehaze slider applied negatively can deepen shadows and increase the contrast between bokeh highlights and dark backgrounds, intensifying that theatrical quality. Selective color adjustments in the bokeh areas can shift the mood dramatically — cooling down background neon, warming up streetlight orbs.
What you want to avoid: trying to add or fake bokeh in post on an image that doesn't have it. The results are always obvious and always unconvincing. Real optical blur has a dimensionality and an interaction with the image that no software currently replicates convincingly.
The Frontier Is Dark for a Reason
Night bokeh is harder. There's no getting around that. It demands better glass, more technical discipline, more willingness to experiment and fail and try again at midnight when most people have gone home.
But the images waiting on the other side of that difficulty? They're some of the most visually arresting photographs you can make with a camera. The darkness isn't the obstacle — it's the medium. And the blur isn't just a technique. After dark, it's how light becomes something close to magic.